
This book page paper wreath tutorial is the first DIY home decor item I’ve made this spring, and it is a dollar store craft!
After taking down my winter wreath, I had a bare spot on my wall. Last year, I made a spring wreath with a cute little bird and some bunting on it. That wreath also had shredded paper, but it was in the form of Easter grass rather than shredded book pages. That wreath is on the wall in my craft room.
Since my craft room is in my basement, I really like the cheery colors of the wreath on my wall and didn’t want to take it down. I’ve used book pages for crafts but wanted to make a DIY home decor item using book pages, so I decided to make a new wreath. I stopped by the dollar store and picked up a wreath to use. The rest of the supplies came from my stash.
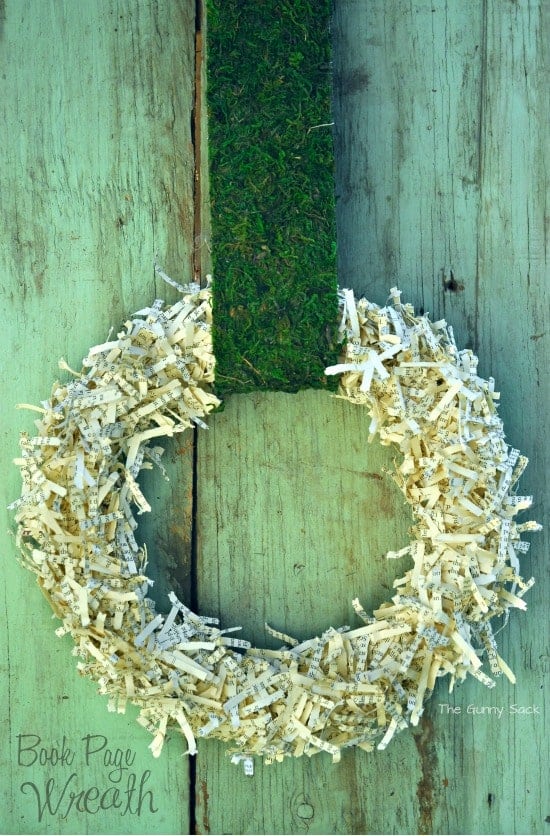
Did you notice that I have a new backdrop in this photo? I am super excited because my sister gave me three pieces of aged wood to use as backdrops, so you will be seeing a lot more of this one, and be on the lookout for the other backdrops!
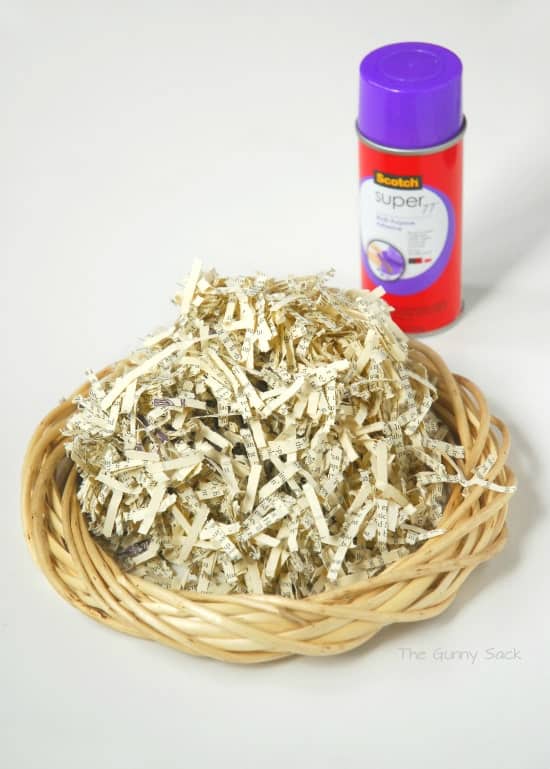
Start with a wreath from the dollar store. Shred pages from an old book using a cross-cut paper shredder. If you don’t have any old books that you want to shred, pick up a $1.00 paperback or two from the dollar store. To adhere the book page shreds, I used Scotch spray adhesive I had on hand from my daughter’s school project. If you don’t have spray adhesive, a craft glue like Mod Podge would work.
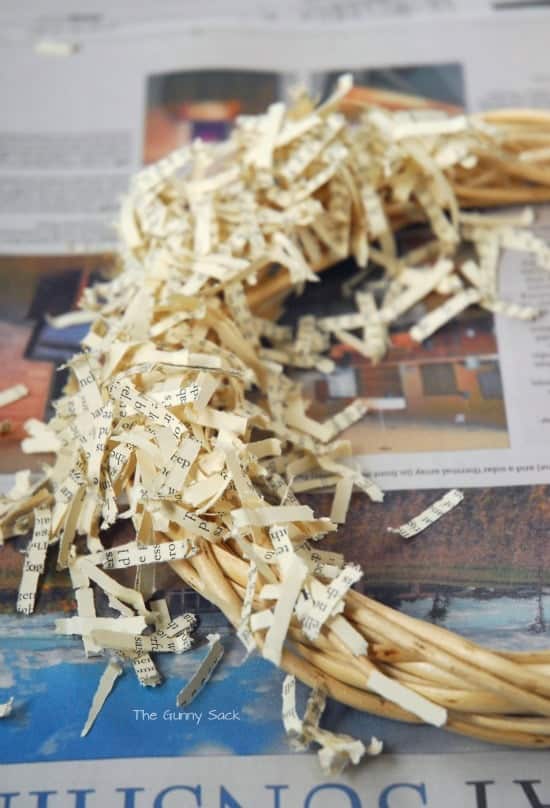
After laying down newspaper, spray the wreath with the adhesive and started piling on the paper shreds. Press and squeeze the paper onto the wreath. If using a craft glue, paint the glue onto the wreath before adding the shredded paper.
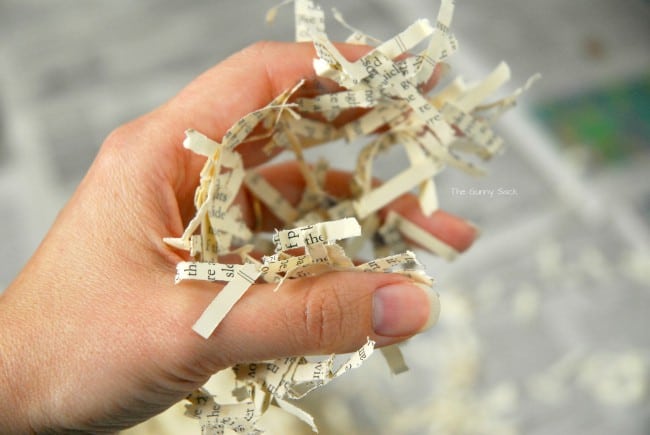
You might end up with book page paper shreds stuck to your hands. Oh well…crafting is a messy business, right?
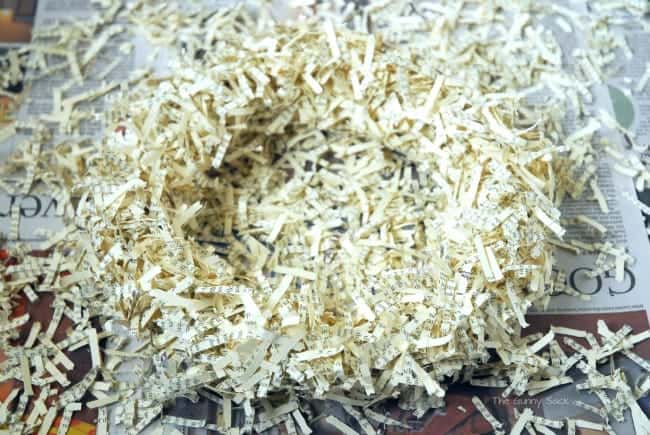
Keep spraying on the adhesive (or painting on the craft glue) and adding shredded book pages, pressing as you go.
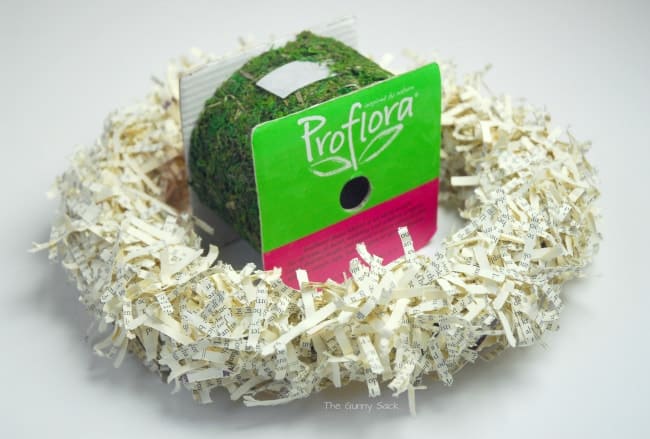
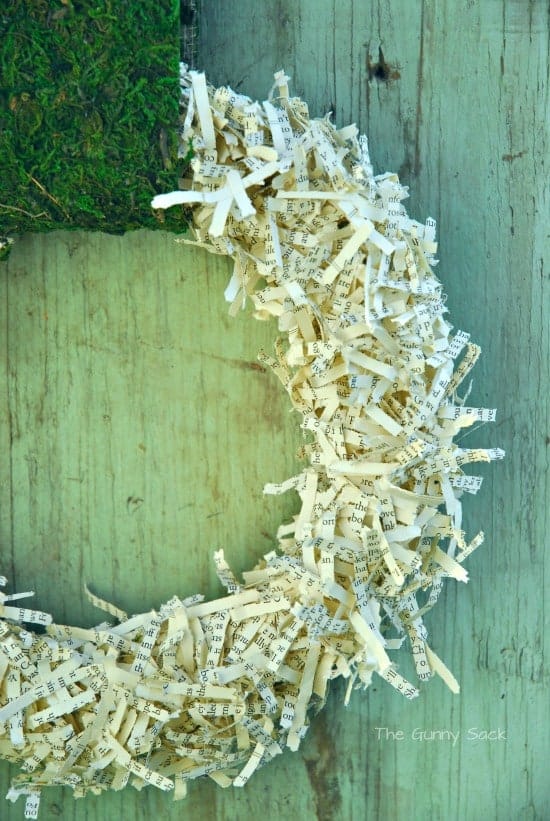
Once there is enough paper on the wreath, let it dry for a couple of hours before adding a ribbon. I grabbed this moss ribbon that I bought on clearance a while ago. It has been sitting in my craft room, waiting to be used. If you don’t have moss ribbon, they sell moss at the dollar store, and it could be glued to a wide piece of ribbon. Or this wreath would look adorable hanging from a piece of burlap.
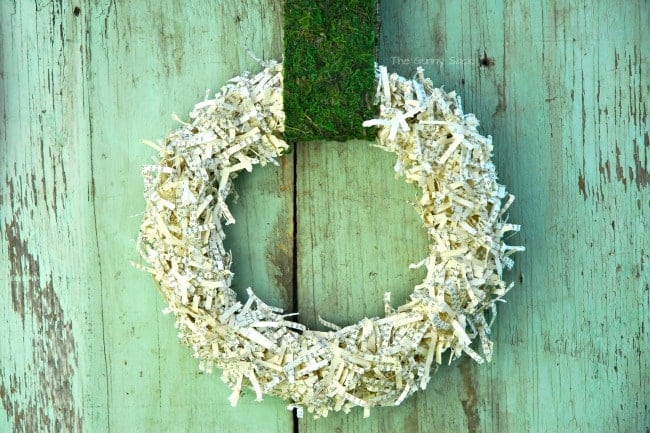
Loop the ribbon of choice through the wreath, and it is ready to be used as an indoor wreath.
I would like to try using a coffee table book of photos for a whole different look!
Ruth Overton says
Great Idea !! You could probably use almost any paper..I save Christmas paper unwrapped from grandkids ! Lol I have made beads out of it.
Thanks for the ideas
Ruth
Tonia says
Great idea! You could make some really colorful ones!
Jane Lavigne says
Comic books would work well too. Lots of colour and you could make cutouts of your kids favourite characters to decorate the ribbon. Just make sure you don’t accidentally shred one of your “collector”s vintage $500 X-Men Classic comics. That could make for an expensive wreath.
Carolyn says
How about a sign in the middle saying, “I couldn’t find the Write words!” Do it on a parchment paper or paper bag using cursive words or cut the letters out from magazines or headlines.
I think I’m going to do one for my American Legion Poppy Craft. Thanks for the inspiration.
Mine’s going to say, “I couldn’t find the Write words to thank you for all you did.”
I will use a camo background for the signage and add a poppy or three at the ribbon area.
Deborah K says
That’s a beautiful sentiment and a way to recycle into something meaningful.
Tj says
Magazine pages would work great for a wreath in color.
Charlette pittman says
I just purchased a coffee table book at goodwill as I needed pictures from around the world for a backdrop for a quilt challenge. The pages are so colorful I am sure this wreath will look great from the travel pictures. I love the idea of using a paper shredder.
kristi@ishouldbemoppingthefloor says
I just absolutely love this, Tonia! So cute!
Mackenzie says
So cute Tonya! This would be a great Teacher Appreciation gift too for HS teachers! Great idea!
Mackenzie 🙂
Alyssa Rivers says
I absolutely love this Tonia! You are so amazingly creative! Turned out great!! Pinned!
Tonia says
Thanks Alyssa! You are a sweetie!
Trish - Mom On Timeout says
I love how easy this wreath is Tonia! So creative too!
Shannah @ Just Us Four says
Tonia – I love it! So simple but really beautiful. The mossy hanger is just perfect for it too.
Tonia says
Thanks Shannah! It is hanging on my wall now and I really like how it turned out!
Jocelyn @BruCrew Life says
I love your new wood backdrop…we got some old deck boards and I “stole” a few to use for backdrops too 🙂 What a fun and easy wreath!!!
Tonia says
My daughter wants to steal my new backdrop for her bedroom! I’m going to have to keep a close eye on it!
emily says
Ha! I love your hand of paper shreds! I’m always so messy… really cute wreath… I came over from Six Sisters… Hope your weekend has been great! Emily @ Nap-Time Creations
Tonia says
Thanks Emily!
Jenna says
I love this Tonia! Especially hanging with the wide piece of moss ribbon, great looking! Thanks for the tutorial,
Jenna
Bliss says
I never thought of shredding book pages, although I pinned one that just used packing shred. I’m pinning this one too so when the mood strikes me to glue up my hands I have more to pick from.
Bliss
Anne @ Domesblissity says
My shredder shreds paper like this and I’ve often wondered what to do with it. Not like the old paper shredder that shred long strips. Great idea Tonia.
Anne xx
Dorothy @ Crazy for Crust says
This is SO creative Tonia!
Megan says
Very unique and creative! 🙂
Tonia says
Thanks Megan!