

As promised, here is the tutorial for the first aid drawstring bags that I made for my son’s class last week. They were such a big hit with the kids! These bags could be used for so many different things like gift bags or toy storage.
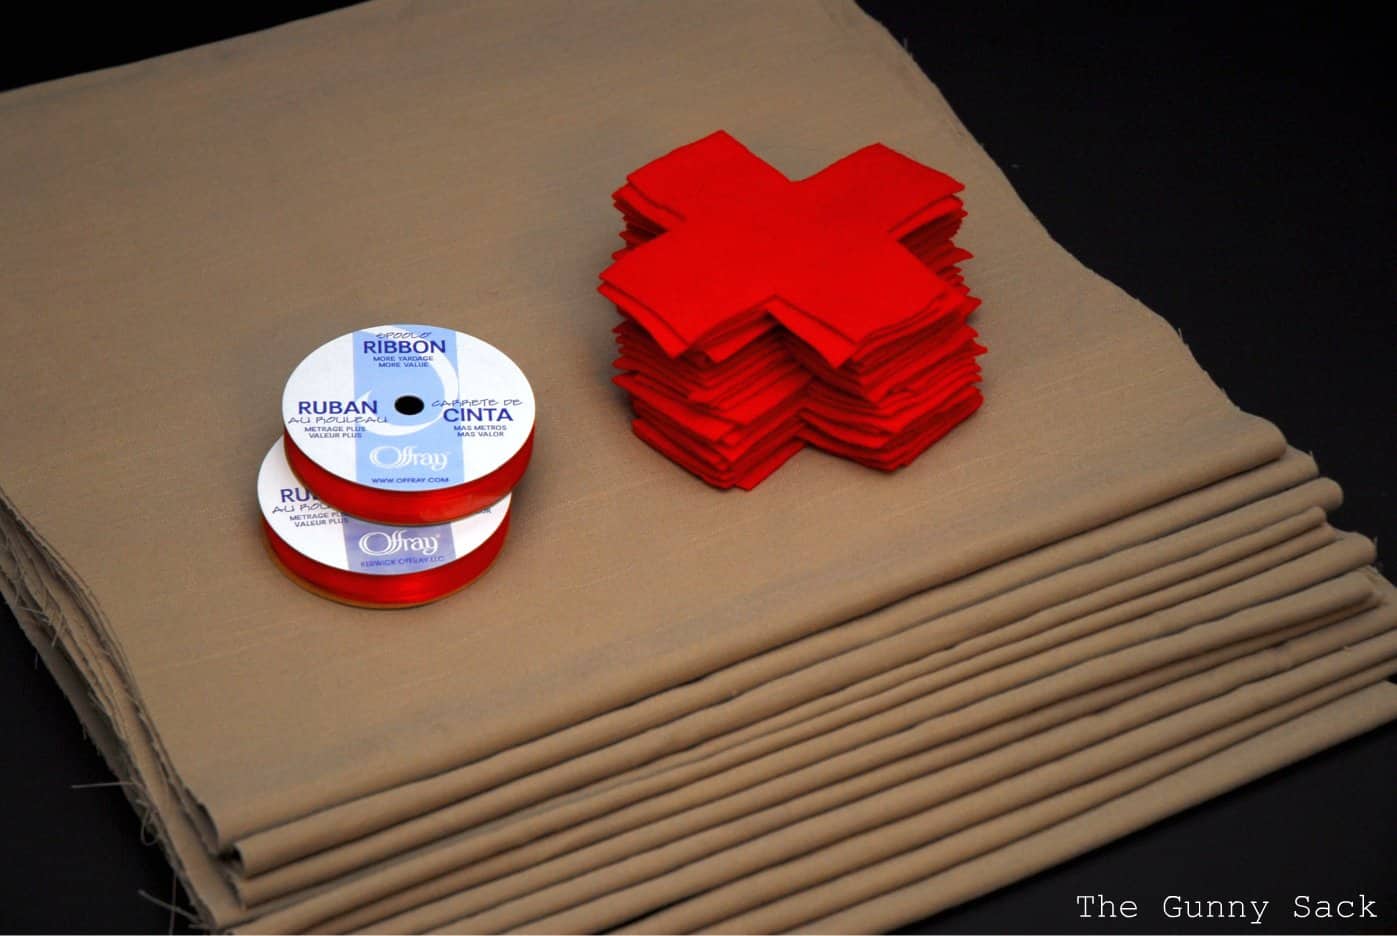
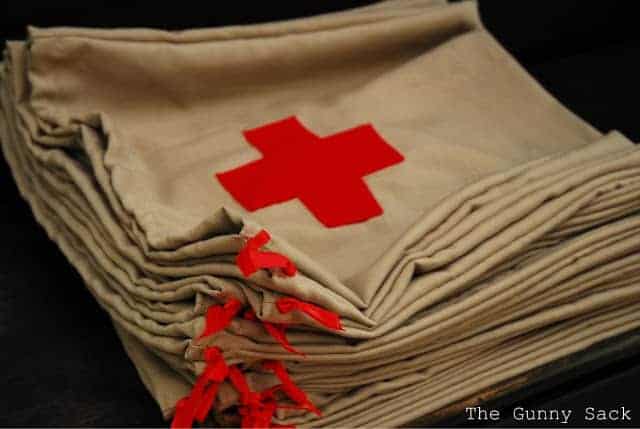
I cut out 25 pieces of fabric that measured 31 x 14 1/2 inches. I also cut out 25 crosses out of red felt. Each piece of fabric is folded in half so that it measures 15 1/2 x 14 1/2 inches.
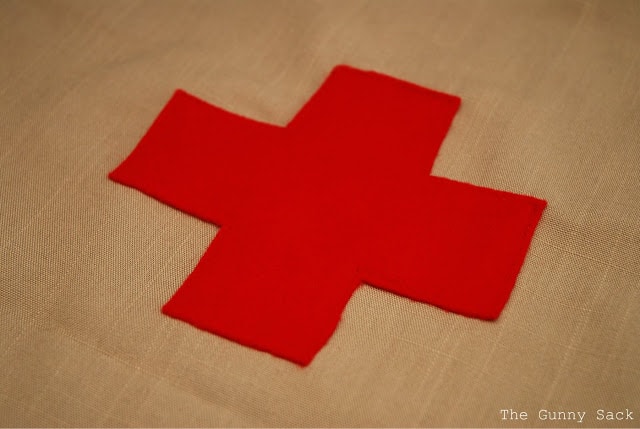
Before sewing the bag, attached the red crosses with red thread. They can be attached after the bag is sewn but it is easier to do beforehand.
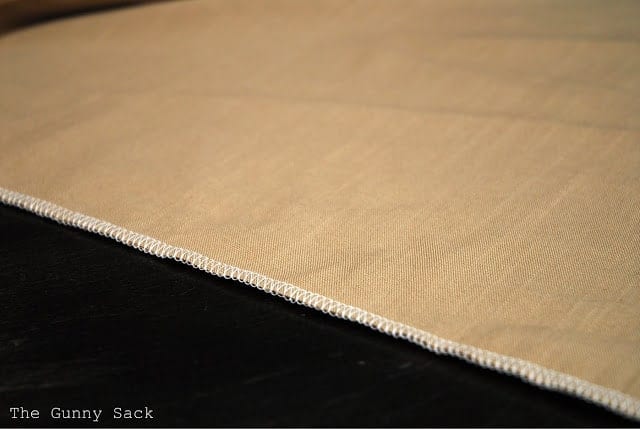
Surge the right and left sides of the bags or sew if you prefer.
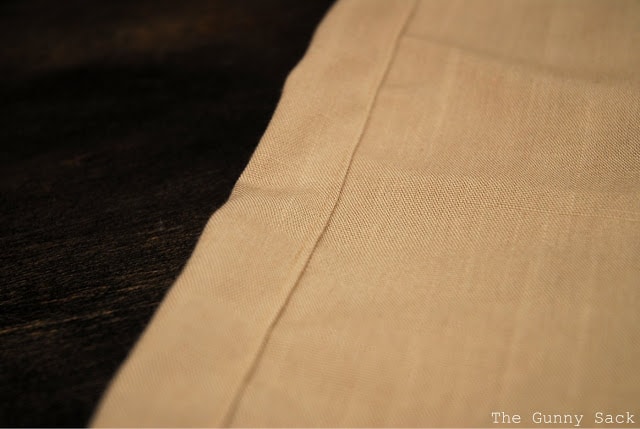
Next, fold over the top about 1 inch, tucking the raw edge under to make the drawstring channel. Sew with thread that matches the fabric.
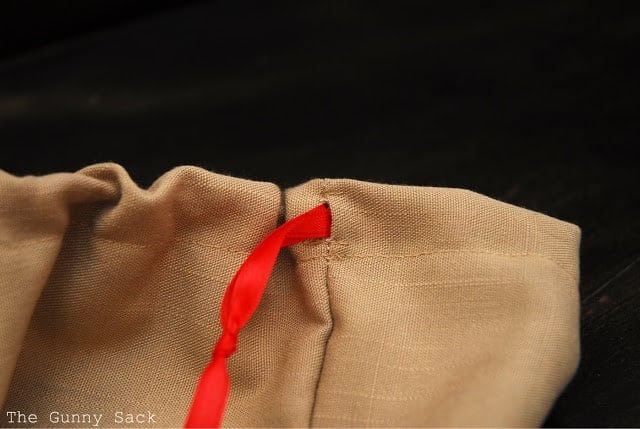
I sewed a few extra stitches to strengthen the opening and then threaded a length of ribbon through the channel. I chose ribbon over cording because of how easily it would slide for the kids.
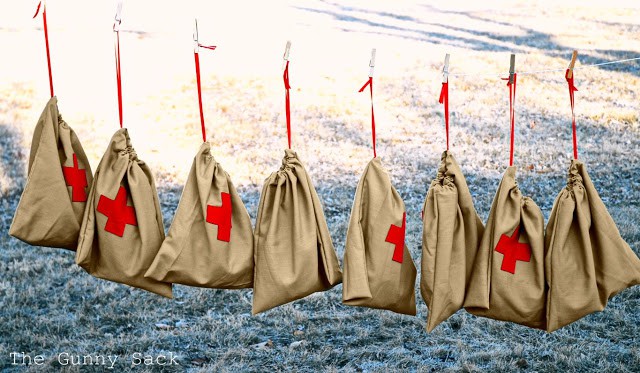
Since I was doing 25 bags, I did one step at a time to all of the bags. I thought it would take me forever to complete the bags but it actually went pretty fast! When I left my son’s class, some of the kids had their bags over their shoulder and others were telling me where in their house they planned to store their bags. It would’ve been fun to make these more into a backpack but that would’ve taken more time and materials so I just kept it simple!
Randi~Dukes and Duchesses says
Those are so fun! They’d be great goodie bags for my twins’ upcoming army party … hmmm, might have to make some too.
A To Zebra Celebrations says
Cute ideas!!!! You are welcome to link to my party on Tuesdays 🙂 New visitor, Nancy
Katie Jakubs says
These are super cute! Thanks for the tutorial!!
I would like to invite you to link up at my first link party going on now. I hope to see you there. http://littlebeckyhomecky.blogspot.com/2012/02/fantabulous-friday-1-random-happenings.html
Katie @ Little Becky Homecky
Di-licious says
What a great idea! Instead of crosses you could substitute hearts or spots to match child’s interest. I think I might make a bigger one to put my daughter’s dirty clothes in when we’re away for the weekend!
Kelly Rowe says
Love these bags!! Thank you so much for linking up to the blog hop! Wishing you all the best in your bloggy endeavors. New follower 🙂 Yay!!
Kelly
http://www.livelaughrowe.com
Lindsey Cazac says
These are genius! I can think of a million uses for these around the house.
I’m stopping by via the blog hop. Nice to meet you! I’m a new follower.
Lots of love,
Lindsey
outofalabaster.blogspot.com
Christine says
Such a great tutorial!! You can use it for various bags!!
I would LOVE it if you shared this on my blog:
http://thediydreamer.blogspot.com/2012/02/from-dream-to-reality-linky-party-4.html
Our Delightful Home says
Great tutorial! I would love for you to link up at my Linky Party via: ourdelightfulhome.blogspot.com
PS: I am your newest Linky Follower
Mrs. Delightful
ourdelightfulhome.blogspot.com
Anne @ Domesblissity says
I love the tan with the red. I think I need to make one of these for the car. Heaven knows, there is always a ‘boo boo’ when we’re out and about! Thanks Tonia.
Anne xx
The Imperfect Housewife says
Fantastic, can’t wait to give it a go!
Cameron Meerdink says
What a great idea – I think I’ll see if I could do this for my daughter’s class – seems appropriate since I’m an ER nurse, right? Thanks for the in-depth tut!
Someday I'll Learn says
Oh my word, these are FANTASTIC!
Lindsay says
These are so great Tonia! You are such an inspiration, you know that! Thanks for sharing!
Clydia says
OMGOSH! I love these! I’m sure these were a huge hit! WOuld love for you to share these at my place.
http://threemangoseeds.blogspot.com/2012/02/features-do-it-ya-self-monday-link_20.html
Already follow you via LINKY. {HUGS}
The Remodeled Life says
These are so adorable!!! I love this! Thanks for stopping by my blog and for the sweet comment. I’m a new follower!
Katie says
This is so cute! And I love how adaptable the tutorial is, you can easily make these bags for so many events!
sherri lynn says
These are so cute! I think they would also be great for presents or favors!
Lindsay @ Delighted Momma says
SO cute!! This would even look cute hung up in a boy’s room on a coat rack as decoration. Love it Tonia!
Rachel {BubblyNatureCreations.com} says
Those look so easy to make and I am sure your son’s class loves them!!! I love the little cross you put on the outside!