
Here is a project for the kids to work on over Easter break.

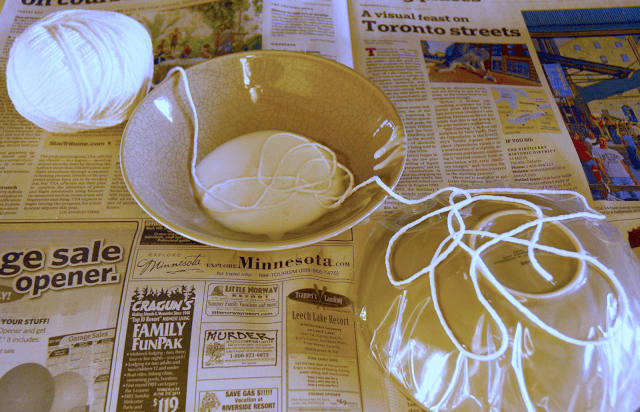
Find a bowl to use a your mold. The shape of the bowl will determine the shape of your yarn bowl. Cover the bowl with plastic wrap. Or if you are out of plastic wrap (oops) use a gallon size ziplock bag. Just stick the bowl in the bag.
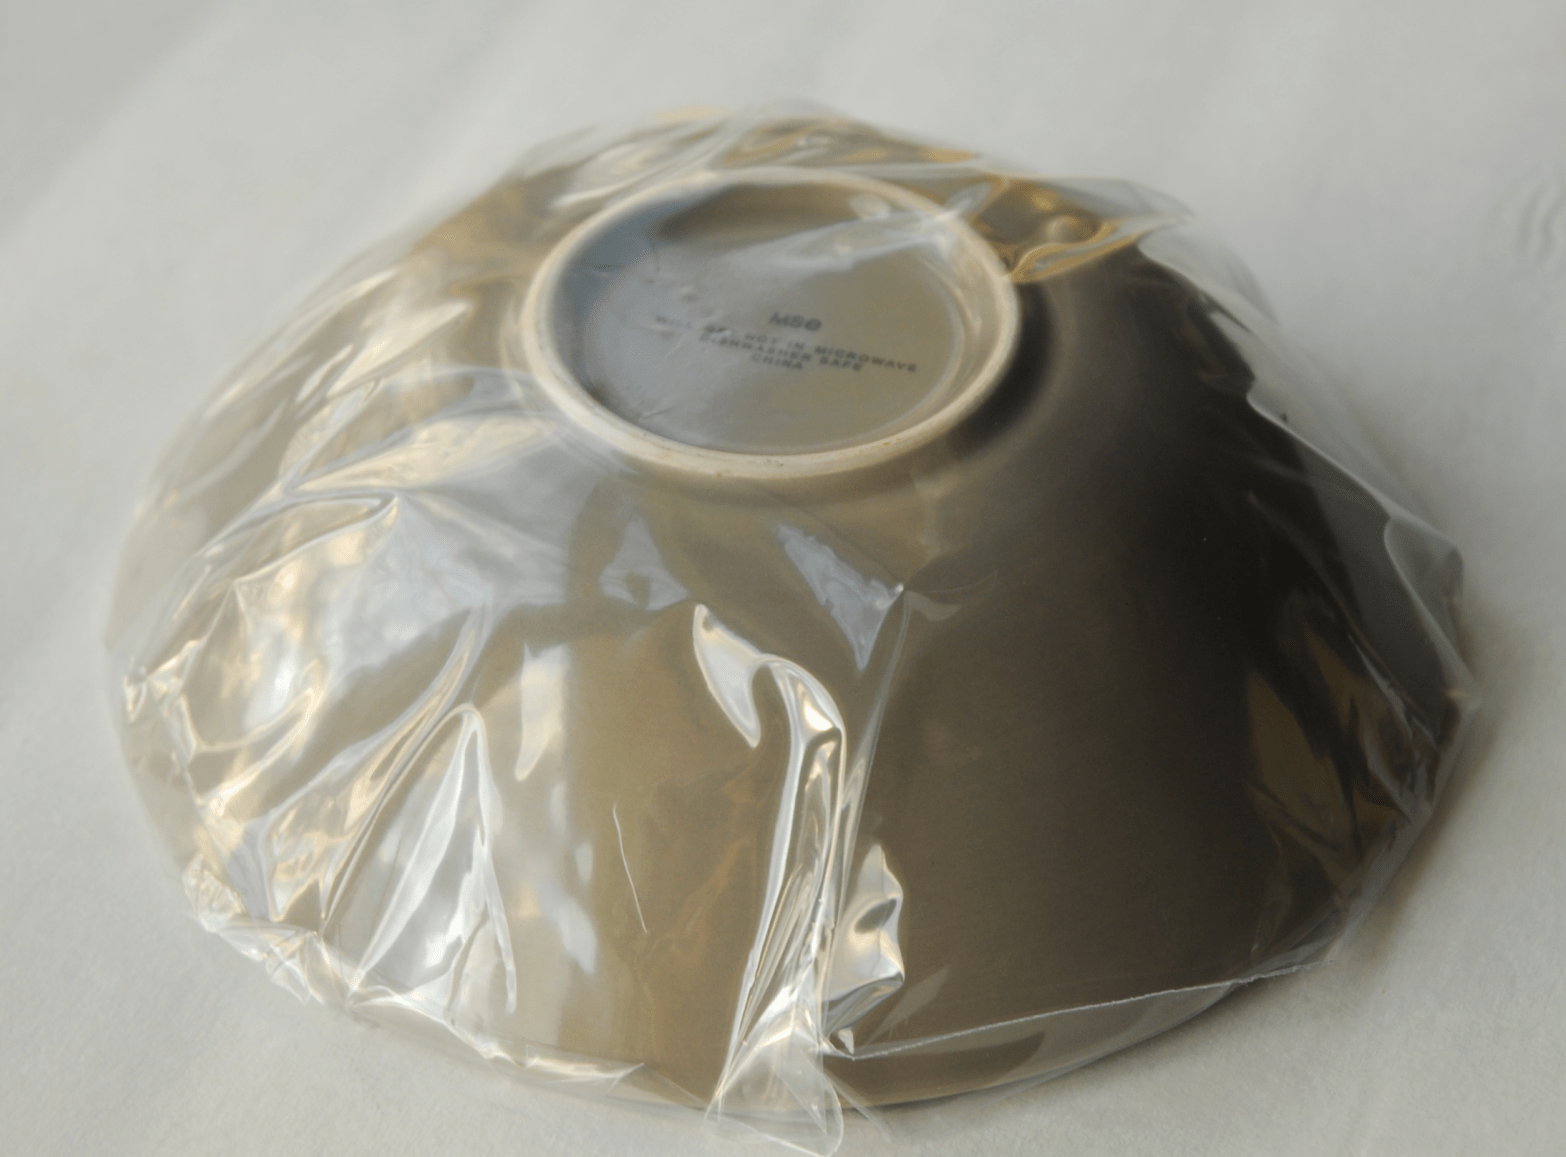
And tuck the ends under.
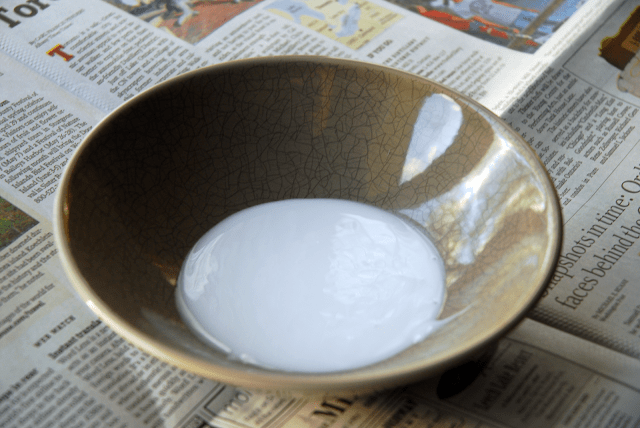
Cover the table with newspaper. Dump some Elmer’s White School Glue into a bowl and add a little water to dilute the glue some. Mix up the water and the glue.

Line up the cotton yarn ball, glue bowl and bowl mold. Dip the yarn in the glue.
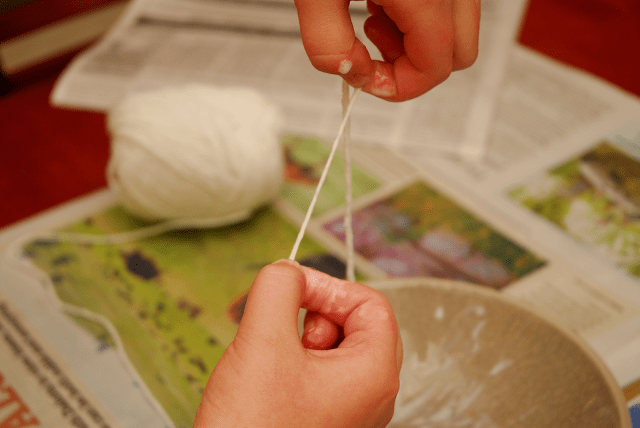
Pinch the string between your fingers and slide them along the string to squeeze off the excess glue.
Then, just wind the yarn back and forth, over and around the bowl mold.
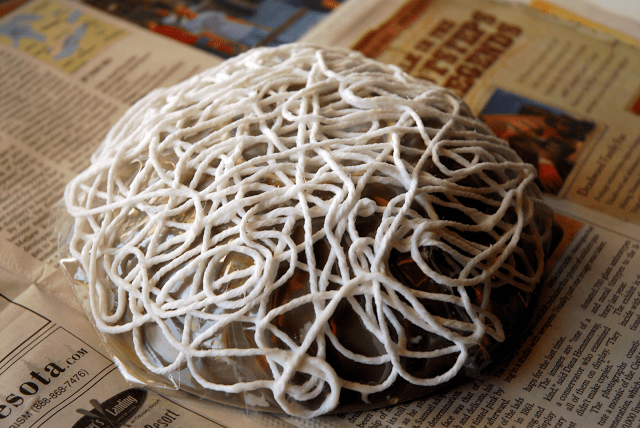
Continue until the bowl is covered the way you want it. Press the yarn down gently to help the strands press together. Allow the yarn to dry. If you are in a hurry, use a hair dryer to speed things up.
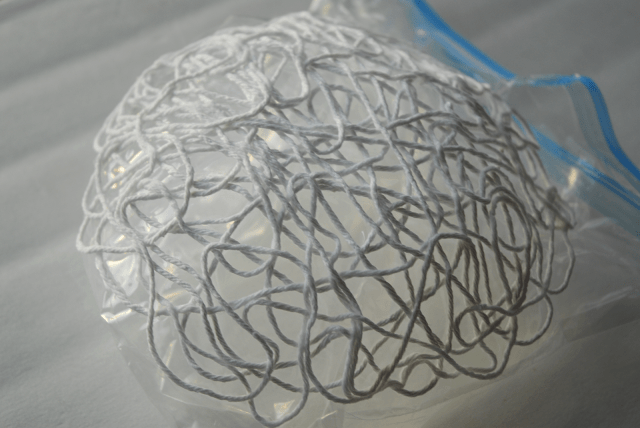
When the yarn if dry, remove the bowl from under the plastic. Then, gently peel the plastic off the yarn bowl.
If you were in a hurry and tried to speed things up with a hair dryer, you may find the yarn not quite dry. Just put the yarn in the inside of the bowl and head back to the hair dryer.
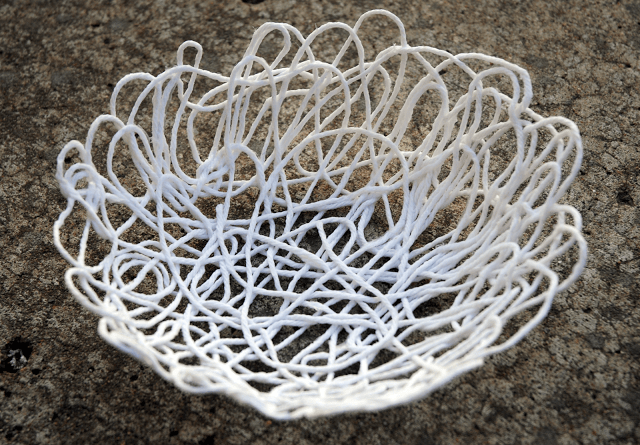
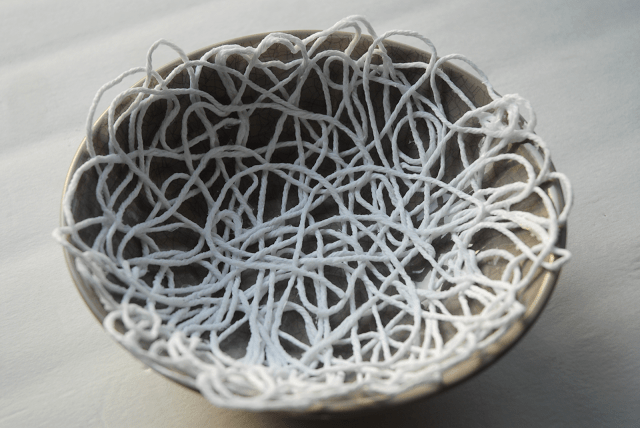
Lift out the yarn and you have yourself a bowl!
Jeanette Trzebiatowski says
thank you so much for sharing .just love it.
Βίκυ says
Perfect, i love it!
Noblesse says
very cute idea, keep it up.
Nicolette @ Momnivore's Dilemma says
Now that’s a mean-written tutorial! I am pinning for your post for a future craft idea…
If you have a moment today, please share this with my readers @Creative Juice Thursday Hope to see yours among all the amazing projects!
Michelle says
This is fabulous!! I love it! I am a new follower and I would love if you would like this up to Made by Little Hands Mondays!
Have a great day!
Michelle
http://www.delicateconstruction.blogspot.com
jessica says
This is so adorable! I absolutely love this idea. I am gonna try it tomorrow!!
Have a great weekend! {I am a new follower from 504 Main’s linky party!!}
Katrine says
Oh wow! I LOVE this!!! I’ve seen these where you crocheted flowers and do it in the same way.. but this is way easier and faster!! I’m definately trying this!!
Thank you!! 😀