
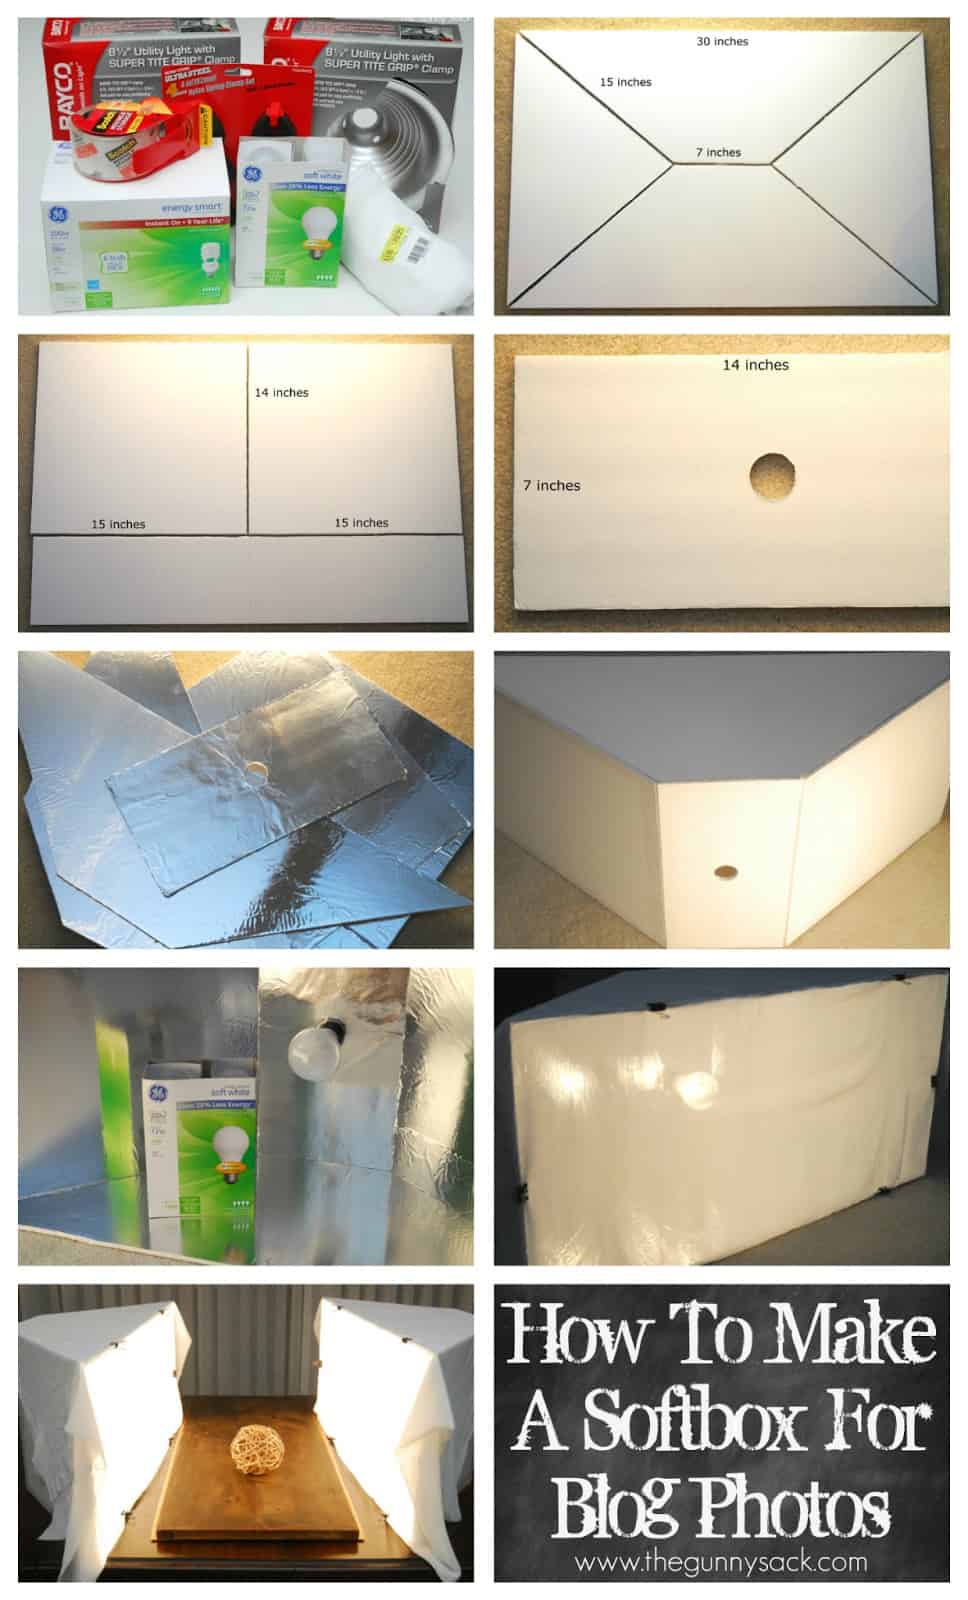
Disclosure: I am a member of the Collective Bias® Social Fabric® Community. This shop has been compensated as part of a social shopper insights study for Collective Bias™ and GE Lighting #CBias #SocialFabric
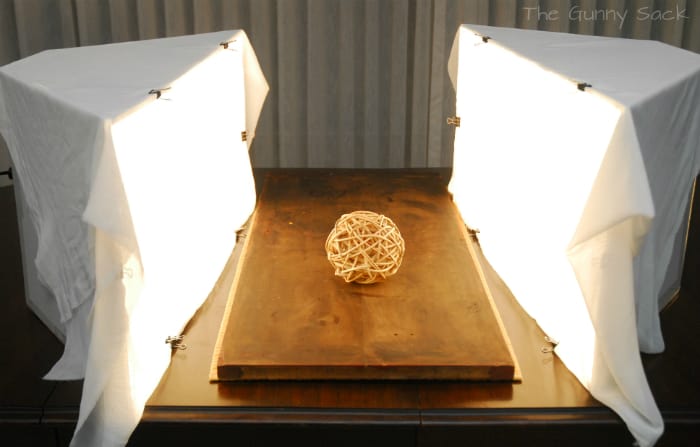
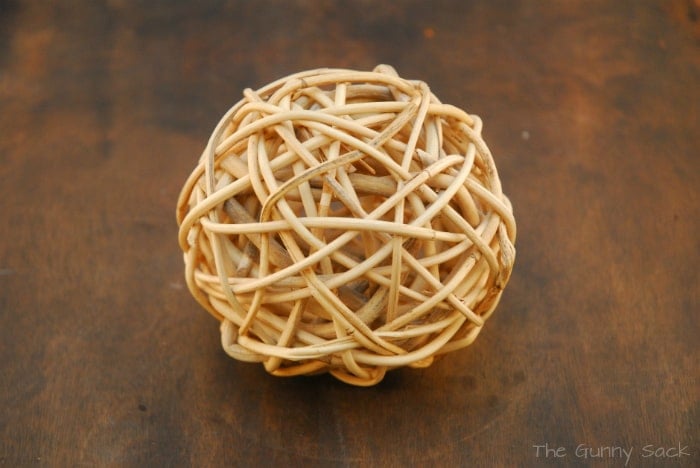
I set the 2 softboxes up on either side of a piece of worn wood and put a ball in the center.
I loved the results so I had the kids take their photos.
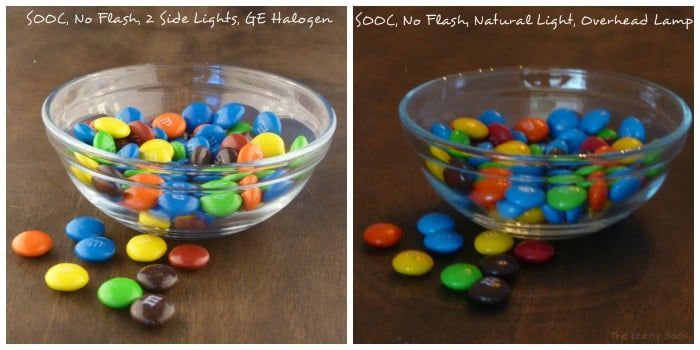
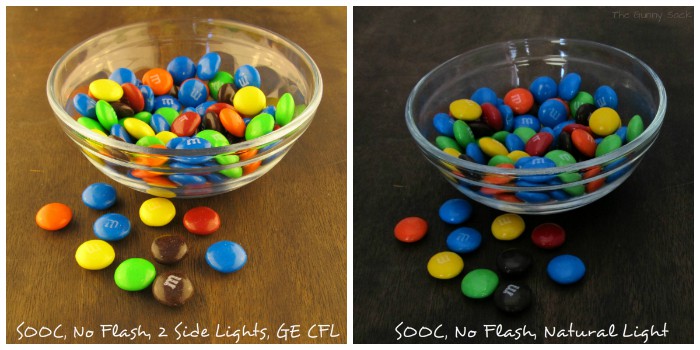
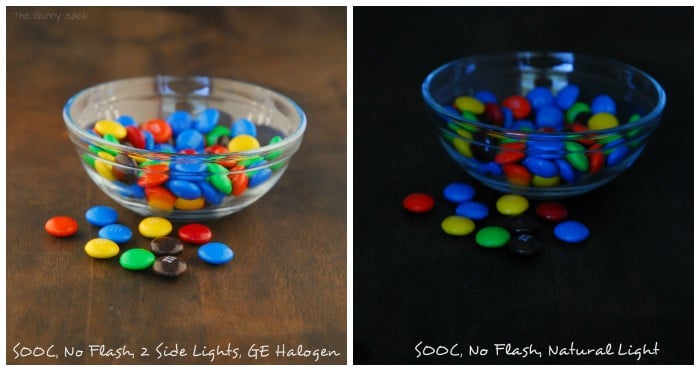
The first set of photos was taken with the GE Energy Efficient Soft White Halogen bulbs. They only use 72w but replace a 100w incandescent bulb. The brightness is 1490 lumens and the light appearance is 2950K.
The second set of photos was taken with GE Energy Smart Compact Florescent bulbs. These bulbs use 26w but replace a 100w incandescent bulb. The brightness is 1750 lumens and the light appearance is 2700K.
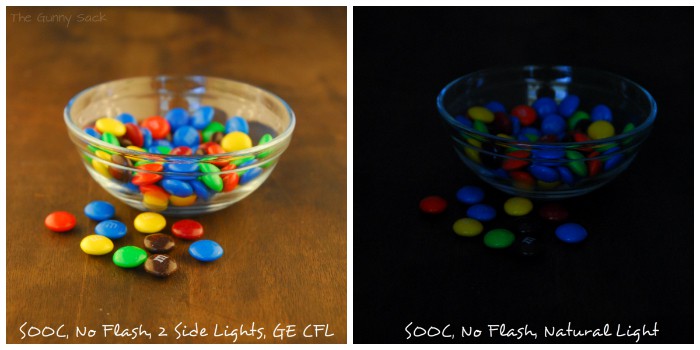
They took a photo with box softboxes on and another with box softboxes off. The flash was off and the camera settings were left alone. The pictures below are SOOC meaning Straight Out Of Camera (no editing) except for cropping when necessary.
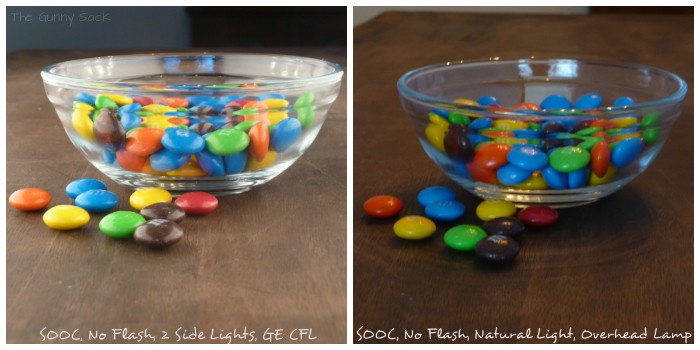
Zack used the Panasonic Lumix to take the four photos above.
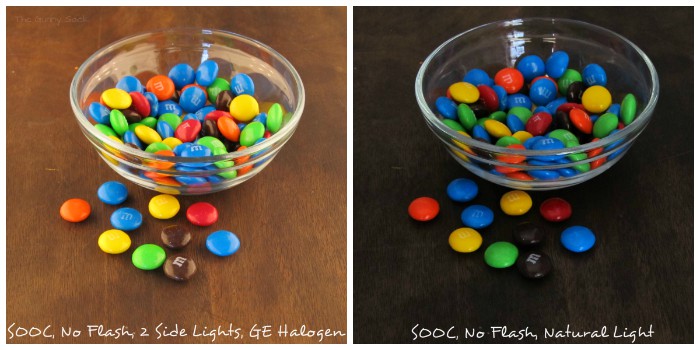
Vanessa took these four photos using Canon PowerShot SX130 IS.
Christine used the Nikon D200 to take these four photos.
We figured out that both types of bulbs work great in the softboxes! The GE CFL bulbs are a little brighter and a little warmer than the GE Halogen bulbs. We will be able to use both kinds in the softboxes since there isn’t that big of a difference.
As expected, the Nikon D200 got the best results. The Canon PowerShot was second best and if we would’ve spent more time using the manual settings on the camera the results would’ve been better. Zack has a hard time getting clear pictures with the Panasonic Lumix but he was taking his pictures later in the day so there was less natural light.
When taking pictures for my blog posts, I will be using the Nikon D200 and I will adjust my white balance depending on which light bulbs I am using in the softboxes.
Amy says
Thanks for the info! I need something like this to take pics of my etsy products on cloudy days. I hate having to wait and wait for a sunny day that I am home and have time to take pictures.
admin says
Thanks Amy! I use it ALL.THE.TIME!!
SalemMomma says
This is a great tutorial, thank you! I have the worst natural light ever, I really need this.
Christina at I Gotta Create! says
Fantastic tutorial! I pinned this one 🙂
<3 Christina @ I Gotta Create!
Wildly Original link party is open.
Mimi Baker says
You did such a great job with this Tonia! I hate how my indoor photos are always so dark! I’m not a big DIYer, but I plan on trying this asap! I also love your 3 examples!
Holly Lefevre says
I really need to do this…my photos are so awful…I just got a “new to me” camera…so now it the perfect time!
Bonnie and Trish @ Uncommon says
oh Tonia..it is like the heaven’s opened!! Thank you!! So have to make one!!! Love that you had the kids take the pics!! 😉
Betsy @ Anna Nimmity says
What a big difference this makes! Thanks for sharing the tutorial!
Anne @ Domesblissity says
Gosh, I could really do with one of those Tonia. Where do you store it when not in use? That’s my biggest problem. Great idea.
xx
Tonia L says
I have the storage space but I would love to set up a dedicated area for taking pictures some day!
Amy Fulcher says
OK, I still have my pvc square in the closet, even have my fabric. Why haven’t I done my light box post yet? 🙂 I’ll get right on it now that I’m inspired!
Tonia L says
I’m sure you haven’t gotten to it because you are so busy! I’m not sure how you keep up your blog, campaign leader work and work a full time job as well!!!
Laurie atSimplyCreatingHome says
Thanks so much for the tutorial! We have a lot of gray days, too, here in the Pacific Northwest, so I definitely need extra lighting to be able to photograph anything well. I recently bought a Canon Speedlite 430 EX and it has helped me so much because I can direct my flash and bounce it off walls, etc, to add the lighting I need. I love the lighting effects you got with your softbox, though, and it would be so helpful to have, too! I pinned this to my photography board. Thanks!
Cathy Trochelman says
This is exactly what I need! Thanks so much for the helpful tutorial – I will get on it (or should I say get my husband on it…?) 🙂
Trish - Mom On Timeout says
Just pinned Tonia! What a great idea and it looks totally doable!
Tonia L says
Thanks for the Pin, Trish!
Di from Life is Di-licious says
Wow Tonia. I love how you involved your whole family in making and testing them out. I’ve been keen to get a softbox for some time now but have been put off my the price. Here in Australia I don’t have the same problems with lack of light but in summertime its too harsh.
Tonia L says
Thanks Di! They had fun helping out!
thepaintedapron.com says
Thank you so much Tonia, I want to design a space for photographing things with great light and controlled background and this tutorial will certainly help. I am a newbie photographer, so much to learn!
Jenna
Tonia L says
I would like to set up an area in my basement that is always ready for taking pictures! It is one of those long term goals of mine but for now the dining room table will work.
Jodie Fitz says
SO psyched you shared this!!!!!!!!!!!!!!!!!!!! THANK you…
Tonia L says
You are very welcome! Thanks for stopping by!
Glenda says
Tonia, this is fabulous! Thank you! Thank you! It is so gray and overcast here in the winters and this is a simple project that will help me make a vast improvement in my photos. Thanks so much for the detailed instructions!
Tonia L says
Thanks Glenda! I can’t wait to hear how they work out for you!
Bliss says
Excellent tutorial.
Bliss
Tonia L says
Thanks Bliss! That means a lot to me coming from a profession photographer like you!!
Ginger says
I soooo need to make one of these! 🙂
Tonia L says
Let me know how it turns out!
Lorilee says
They look pretty simple to make. My problem is storage! They look pretty big and bulky! I really like the GE Halogen shots!
Blessings,
Lorilee
Tonia L says
You should look for a tutorial on making a collapsible softbox! That would make storage easier!
Jodi S says
I will definitely be pinned this one to come back to at a later date- great info, Thanks so much 🙂
Tonia L says
Thanks for the Pin! Best of luck on making yours!
Michelle Paige says
Wow! What a project and what a difference! We always need more light here in Seattle!
Tonia L says
Thanks Michelle! I know what you mean! My husband’s brother just moved back to Minnesota from Washington state due to the lack of sunny days!
Shannah @ Just Us Four says
Making these has been on my project list for ages! I just need to get my butt in gear and do it. It is amazing seeing the difference!
Tonia L says
They were on my list too! Once I got started they were easier to make than I thought they would be.
Rachel {BubblyNatureCreations.com} says
That’s it! I am making some softboxes!!! 🙂 I love the halogen light. Great job!
Tonia L says
Yay! I can’t wait to hear how they turn out!
Judy Bagwell says
I normally try to use outdoor light for my blog pics, but lately it has been raining and overcast where I live, so that just isn’t happening. I began been searching for a way to take good indoor shots and saw your post. Thank you so much for sharing this!! I am making my shopping list right now. 🙂
Tonia L says
I know what you mean Judy. Here in Minnesota it is too cold to head outside to take pictures and now that we have less hours of daylight it is even more challenging! Best of luck making your softboxes!
Nana says
This is so amazing, and information I can really use. I love that you had your kids involved in this project, I am sure there are some future photographers there. Fabulous job!!!
Tonia L says
Thanks! They all enjoy photography and love getting involved in my projects so it is a lot of fun!